Pages

Tuesday, December 31, 2013

Happy New Year! 新年快乐!

On the last day of 2013 I'd like to wish all my friends and readers a wonderful 2014 ahead, one which will be filled with good health, peace and many happy moments. ❤️

Happy New Year! 新年快乐!


Tuesday, December 24, 2013

Merry Christmas & Happy 2014!

It has been a long time since my last update. How are you my dear friends and readers? Due to my work and family commitment I am unable to update my blog and leave you comment as often as I wish. I hope everyone is doing well and I believe so.

It's a last minute decision to bake a log cake this afternoon. With limited cream on hand, I apply a thin layer of cream and cover the cake with desiccated coconut and tada Snowy Log Cake is done! 


The cake base is vanilla chiffon cake with Hokkaido milk. I also brush some rum syrup on the cake before adding cream and rolling up. 


We have a mini Christmas Eve party at home tonight. Let's see what I have prepared. 


Air fried prawns with fresh fruits (apple, guava and strawberry). 


Chocolat Blanc Et Langue De Chat, cocktail sausages, roast pumpkin and sweet corn.


Fried chicken 


Wishing everyone Merry Christmas and a wonderful 2014 ahead with full of love and laughter! ❤️

祝亲爱的朋友和读者们圣诞快乐,在来临的2014年幸福满满,身体健康!❤️


Monday, August 26, 2013

Umani – Japanese Stew Root Vegetables


Umani is Japanese stew root vegetables with chicken. I had it in a small Japanese family restaurant recently and I fell in love with it immediately. So I tried to imitate the dish at home. My family liked it very much.  


Traditionally the main ingredients used are radish, carrot, lotus roots and burdock. Since the portion will be too big for my small family so I didn't add burdock. I also replaced chicken with pork belly as I need to “clear stock” in my freezer. If I were to cook again I would prefer to use chicken wings. 


Here is my version of Umani.

Ingredients: (serve 4)
300g-500g chicken thigh/wings/ pork belly
1 radish
2 lotus roots
1-2 carrots (depends on size)
6 shiitake mushrooms (pre-soak in water)
+/- 2 cups bonito flavoured dashi stock*
*I used water + 1 sachet (4g) of bonito dashi powder bought from Daiso

Seasonings:
3 tbsp shoyu
3 tbsp mirin
2 tbsp sake
Sugar to taste

Method:
  1. Cut all ingredients into big chunks.
  2. Heat a deep pot with little oil; add meat and sauté till fat is released.
  3. Add mushrooms, sauté till fragrant.
  4. Add the rest of ingredients (see note), stir to mix and add stock to about the height of ingredients, add seasonings to taste.
  5. Bring to a boil and simmer over medium low heat, stir occasionally, until all ingredients are fork tender and stock reduced by half or more.

Kitchen notes:
  1. You may want to add the lotus roots first to cook for a while before adding other ingredients as it takes more time to cook.
  2. Place a piece of baking paper/grease-proof paper on the ingredients helps to keep the moist and ingredients will be cooked faster.
  3. Suggest cooking this in advance and let it sit in the pot to allow all ingredients especially the radish to fully absorb the stock. 


Friday, August 23, 2013

Blueberry Chocolate Mille Crêpe Cake with Chocolate Crisp Ball 蓝莓巧克力法式千层蛋糕


八月份可以说是家里的生日月,第一个星期是Angel的生日,第二个星期是姑姑的生日,第三个星期是Al堂弟的生日。

姑姑生日的Mille Crêpe Cake得到大家的喜爱,所以堂弟的生日家人也要求Mille Crêpe Cake。我用了同样的食谱,只是把内馅换了。


Tuesday, August 20, 2013

Blueberry Mille Crêpe Cake 蓝莓法式千层蛋糕


风靡一时的千层蛋糕到现在我才第一次尝试制作,因为做过的人都说这个蛋糕很花时间,要有罚站的心里准备,所以我被吓倒了。这是做给姑姑的生日蛋糕,很高兴第一次做就得到了好评,可能大家都没吃过正宗的吧?!

花了50分钟来煎饼皮,比我想像中好。没有功夫煎到很薄,只煎了19张。其实我觉得煎饼皮和组合饼皮还蛮好玩的。

夹层我只用了简单的打发鲜奶油和市售的蓝莓酱,还不错吃。


Tuesday, August 6, 2013

Steamed Egg with Cheese 乳酪蒸蛋


This is a dish I created for my son after he turned one. He likes it a lot. I didn't add any seasoning because the cheddar cheese is already salted and I also try to avoid adding seasoning when cooking for young kid.


Friday, August 2, 2013

近况 ~ 史上最软蛋糕?Hokkaido Chiffon Cupcake


大家好!感觉离开了好久,其实也差不多一个月而已。有没有人想念我? :P

之前去了趟曼谷小旅行算是冲了电。回来后就开始忙新工作,放下熟悉的领域,重新开始需要莫大的勇气,庆幸在自己还不算太老时给了自己另一个机会。离开comfort zone 像是一场赌局,是赢是输现在还不知道,但是至少踏出了第一步。


Thursday, July 4, 2013

Cinnamon Coffee Marble Chiffon Cake 肉桂咖啡戚风蛋糕


第一次做云石戚风蛋糕,做得不是很好。我是在蛋白蛋黄混合后才取出一部份加入肉桂粉和coffee paste,也许是这个原故,面糊有点消泡,烤出来的蛋糕没有平时的高。另一个原因也可能是这回我用了比较小颗的鸡蛋。但是,这并不影响蛋糕的口感,蛋糕还是很松软。

肉桂和咖啡的香气让人无法自拔,至少对于我来说。以云石的方式呈现,比起整个蛋糕做成这个口味更容易让不好这味道的人接受。


Thursday, June 20, 2013

Playing with New Mould ~ Cooked Dough (Tang Mian) Pandan Chiffon Cake 烫面班兰戚风蛋糕


How are you doing everyone? Sorry for not being able to update this blog and reply to comments on time due to my work and personal commitment. I am grateful that despite lack of update there are still regular page views on this humble blog of mine. To all my readers, thank you very much for your visit. I foresee I will be getting busier in the near future but I wish to maintain this blog as far as I can.

Today I am sharing a new Pandan chiffon cake recipe which I did last month using my new chiffon tin. I have spotted this tall and slim chiffon tin some time ago in some of my favourite blogs. And yes, I fall in love with it because of its shape. Thanks to D for getting his colleague to get me one from Shanghai. In case you are interested, the brand is 三能 and the model is SN5234.


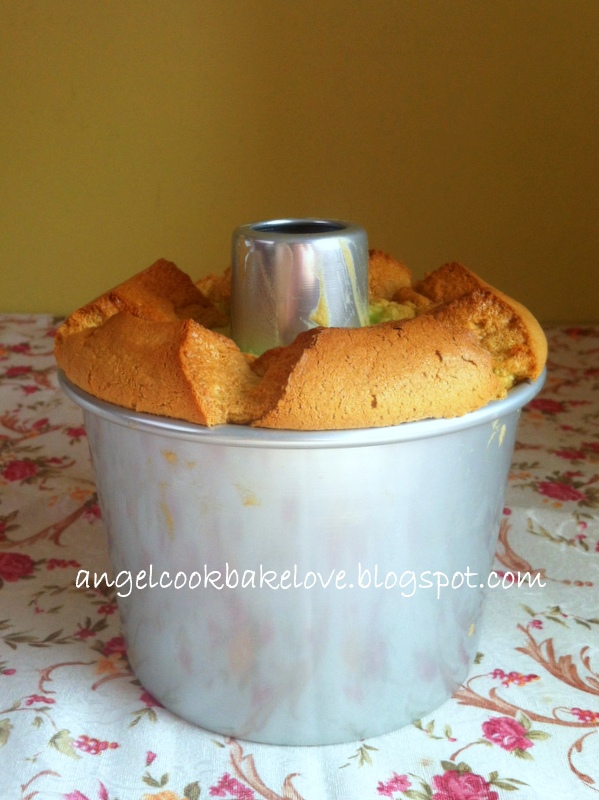
The size of the chiffon tin is 6”. The base is actually much smaller than the usual 6” chiffon tin but the height is much taller. I think this is the reason I find it more difficult to unmould using bare hand as compared to normal chiffon tin. You really need to press down the cake a lot in order to unmould.

I had some leftover coconut milk from cooking curry so I decided to make a Pandan Chiffon Cake as the “open ceremony” for my new chiffon tin. I adapted a recipe from Alex Goh’s book “Fruity Cakes” which was meant for Swiss roll. Below I am sharing my adapted recipe. The first amount is for 8” chiffon tin whereas the amount in blanket is for 6” chiffon tin. I prepared 8” recipe but baked in 6” tin (filled up till about 70%) and remaining batter baked into cupcakes.

This recipe uses melted butter instead of oil. I find it a bit overwhelming especially I am using store bought pandan paste this time which is not as fragrant as home-made one. However, the texture of this cake is fabulous, very soft and moist. Thanks to the cooked dough (tang mian) method.


Cooked Dough (Tang Mian) Pandan Chiffon Cake

Ingredients:
(A)
60g (45g) butter
(B)
60g (45g) plain flour, sifted
(C)
60g (45g) coconut milk
½ tsp Pandan paste/ extract
(D)
4 (3) egg yolks
(E)
4 (3) egg whites
80g (60g) sugar
Pinch of salt (omit if using salted butter)

Method:
1) Cook (A) till butter melted. Add (B) and mix until well blended with a hand whisk.
2) Add (C) and mix until well blended.
3) Add (D) and mix well.
4) Whip egg whites in (E) until foamy, add sugar and salt. Continue to whip until about 90% stiff peak (9 分发).
5) Fold in 1/3 of the meringue to egg yolk mixture. Continue to fold in balance meringue until just incorporated. Do not over mix.
6) Pour batter into tube pan and tap the pan on tabletop to release any big air bubbles.
7) Bake in preheated oven at 170C for about 40-45 mins until cooked.
8) Invert to cool down completely before unmouding.


Thursday, May 30, 2013

Old-Fashioned Curry Bun 老式咖哩面包


(制作于2013年3月24日)

这面包算是无心插柳的成果。好久都没做面包了,翻看了Alex Goh老师早期的面包书,《烘出面包香》,选了里头的cheese bread但揉好面团后才发现家里的cheese不够,瞄到架子上的几颗马铃薯,即想到做马铃薯咖哩面包,趁面团在发酵的时候煮馅料。


Wednesday, May 22, 2013

Richard Goh’s Cake Deco Class 6: How to Make a Barbie Doll Cake?

14th April 2013

I guess this must be the most popular lesson among all the 8 lessons. Weeks prior to the lesson, some of us had started to discuss what doll to buy, where to buy, what colour to use for the Barbie Doll dress…etc. Personally I have also done some research from the Internet and think about the design of my Barbie doll dress before the class.

What you need?
  • One basic round 8” or 9” sponge cake (height 1.5” to 2”)
  • One basic round 6” or 7” sponge cake (height 1.5” to 2”)
  • Turntable
  • Long serrated knife
  • Flat spatula
  • Piping bag
  • Piping tips
  • Whipping cream
  • Food colour
  • Barbie doll (of course it can be any doll)
  • Two cake boxes

What I learn from this class?
  • Carve and trim cake into the shape of Barbie doll dress and secure the Barbie doll (without legs) on the cake.

How to make a Barbie Doll Cake?

1) Slice and stack the cakes (bigger cake at bottom). Sandwich each layer with whipping cream as usual. Avoid chunky fillings and place your fillings near the centre only because you are going to trim away the side. I used sliced strawberries and mangoes which is ok. Just don’t cut into cubes.


2) Make a small round marking on top (this is where you insert the Barbie doll). You can use a small bowl or a round cookie cutter. Use a serrated knife, hold it 45 degree, use the round marking as a guide to cut and carve the cake into dome shape. Take note that the tip of the knife must touch the base (cake board). 


3) This is how the cake looks like. If you are not satisfied with the shape (eg. the cake is slant), use the excess cake to patch back and trim again.


4) Once you are satisfied with the shape. Cut a small hole based on the round marking and insert the Barbie doll (pull out the legs first) and patch the hole using the excess cake crumbs to secure the Barbie doll. If you are using half body doll bought from baking supply shop, you can skip this step. (Tips: make sure you tie the hair of your Barbie doll before inserting the cake).


5) Remove the doll and crumb coat the cake now. To smoothen the frosting, cut a small piece of baking paper or plastic sheet (about 3cm x 30cm), hold it at both ends horizontally. Glide the paper from bottom to top of the cake. Scrape the cream on paper and repeat this step around the cake until the frosting is smooth.


6) If you going to cover the whole cake with piping you can do so now after the crumb-coat. Insert and secure the Barbie doll first before piping (refer to step 3). If you only intend to pipe some designs (i.e. not cover the whole cake with piping) then you need to apply another layer of whipping cream and make sure the frosting is smooth. Decorate the cake (design your own Barbie doll dress) as desired.


This is the doll I use for my cake. It costs me S$2.00 from Daiso. It is smaller and shorter than the usual Barbie doll.


And here is my Barbie Doll Cake. By the way, the cake didn’t survive till we reached home. It was hit by my little boy when we were on our way home and the doll almost dropped.


There are many ways of making a Barbie doll cake. The method we learnt in class is to pull out the legs of the doll before inserting the cake. I find the biggest problem with this method is the short waistline especially if you are using a small doll because in order to secure the doll you need to push it into the cake, so part of the waistline will be inserted into the cake. As a result, my Barbie doll looks like she is wearing a Hanbok (Korean traditional costume). If I were to try making another Barbie doll cake I am sure I would like to try inserting the doll without pulling out the legs.  


When doing piping it is always good to do some markings before you start. After crumb-coat, I marked the area where I wanted my ruffles to be. Then I used a big rose tip (Wilton # 104) to pipe one round at the bottom. Hold the tip vertically, narrow side facing up. Pipe ruffle by moving the tip in “up down up down” motion (like write “N”). After which, I changed to a smaller rose tip (Wilton # 101) to pipe ruffles at the centre front where I have marked.

Photo taken in class. The colour is closer to the actual colour.

Next, I changed to Wilton # 32 to pipe swirls all over to cover the rest of the gown, starting from bottom. For the top, I just piped lines to form a tube top by using Wilton # 02. Lastly, I piped ruffle using Wilton # 104 at the back of the waist and added some sugar pearls on the swirls and front of waist.


For the cake base, I used the same recipe as this Matcha Chiffon Cake.  I scaled down the recipe to 7 eggs, replaced partial flour with cocoa powder and made into one 8” round cake and two 6” round cakes. I must say that I am really happy with the result this time. The cakes did not shrink at all after cooling down and the texture was very good.
 
Cross-section of my cake - with sliced strawberries and mangoes.

Here are some of my classmates' masterpieces.


Monday, May 13, 2013

Mother’s Day 2013 ~ Hidden Heart Cupcake 隐藏的心杯子蛋糕


虽然母亲节已经过了,我还是想在这里祝我的妈咪朋友和读者们“母亲节快乐!”。

今年我收到最好的礼物就是小儿在没有爹地的引导下主动跟我说“Happy Mother’s Day!”,是第一次哦!听到的那瞬间真的很感动,感觉好窝心哦。


Tuesday, April 30, 2013

Happy Birthday to April Boy ~ Rose Mango Layer Cake 玫瑰芒果夹心蛋糕


过去的周末D过生日,和往年一样生日前都会先问他要什么生日蛋糕,答案也是一样,就是芒果蛋糕。四月份本来就是芒果的季节,用当季的食材最好不过。

敲定蛋糕主题后我开始在想究竟要做芒果慕斯蛋糕还是一般的芒果夹心蛋糕。虽然很想尝试制作芒果慕斯但想到要下了班等宝贝睡着后才能开工,最后还是选择了比较少工序的芒果夹心蛋糕。


Thursday, April 25, 2013

Richard Goh’s Cake Deco Class 5: How to Make 3D House Cake?

7th April 2013

We are going to build and design our own (edible) house and garden this week. I would think that this is something you can do together with your kids for bonding session. It is really fun.

  
What you need?
  • A square 8” or 9” butter cake (height 2”)
  • A square 10” or 11” sponge cake (height 1”)
  • Knife
  • Flat spatula
  • Whipping cream (or buttercream)
  • Desiccated coconut + green food colour ( for the “grass”)
  • Piping jelly + blue food colour( for the “pool”)
  • Candies, cookies, marshmallows…..(for decoration)
  
What I learn from this class?
  •  Cut and form a house shape from a square cake
  
How to make a 3D house cake with garden?

1) Level the butter cake. Cut into half (must be precious).


2) Spread cream on one piece of cake and stack another piece on top.


3) Divide cake into 3 equal portions, cut out 1/3 of it (must be precious).


4) Lift up the 1/3 portion of cake to standing position.  Cut diagonally into 2 triangles.


5) Place the 2 triangles together to form the “roof”.  Joint them with cream.


6) Place “roof” on top of the remaining 2/3 of cake. Joint them with cream. Now a house shape cake is formed.


7) Spread cream on the sponge cake. Then place the “house” on top of your preferred position.


8) Spread cream to cover the “house”. If you are going to cover with all the decorative stuff you just need a crumb coat. If you are exposing the cream then you have to cream it nicely but it is not easy to frost a 3D figure smoothly.

9) You may start to decorate your house now follow by garden. If you are going to cover the garden with “grass”, do it after completing the house decoration. Just mix desiccated coconut with green colouring. Sprinkle on top of the sponge cake and coat the sides. If you want to have a “pool” in your garden, just reserve an area for it (don’t sprinkle desiccated coconut on top) and add piping jelly on top.


So here is my creation, overly sugared house, haha.


The house and garden were built from these 2 cakes, top – Rum Butter Cake, bottom – Pandan Chiffon Cake.

For the Pandan Chiffon Cake I used the same recipe as this Matcha Chiffon Cake, omitted the matcha powder and added about ½ tsp of pandan paste.


The “tiles” and the “windows” were also made of the same cake. I piped excess batter on macaron mat and sieved some icing sugar on top before baking.


My original design, can you tell the difference?


I managed to take some photos of my classmates’ creations.  Aren’t they pretty? I am really glad that I am able to learn together with a group of talented and passionate home-bakers. Thumb up everyone!


Related Posts Plugin for WordPress, Blogger...
"总觉得用心准备的食物不只是味蕾的触动,也是一个记忆,一个我想留给身边心爱的人的记忆。这也就是我用心做菜,细心专研的原因和推动力。"